Quick Facts
- Market Context: Roku OS held a 34% unit market share in the United States as of early 2025, making it the most popular smart TV platform.
- Top Tip: Switch to Movie mode immediately for the most accurate color representation and cinematic depth.
- Essential Update: Ensure your TV is running Roku OS 12.5 or higher to access advanced on-screen expert controls.
- The Game Changer: Locate and turn off Action Smoothing to eliminate the soap opera effect and restore natural motion.
- Hardware Milestone: As of April 2026, Roku serves over 100 million streaming households worldwide, proving its dominance in home entertainment.
- Port Memory: Remember that Roku saves picture settings individually for each HDMI input; your PS5 and your cable box need separate calibrations.
As Roku reaches 100 million households, many users are missing out on true 4K clarity due to factory presets that prioritize brightness over accuracy. To achieve the best image for movies, switch your Roku TV to Movie mode to improve color accuracy, and access the Roku TV expert picture settings for 4K clarity via the mobile app to fine-tune Gamma Correction and white balance.
Level 1: One-Click Fixes with Roku TV Picture Modes
When you first pull a Roku TV out of the box, it is usually set to Low Power or Vivid mode. These are designed to catch your eye on a brightly lit showroom floor, but they are disastrous for a home theater environment. The gateway to better visuals is the Asterisk button on your remote. Pressing this during playback opens the sidebar menu where you can toggle through various Roku TV picture modes.
For most users, Movie mode is the gold standard. It shifts the color palette away from the artificial, blue-heavy tint of Vivid mode and toward a more natural, cinematic look. If you are watching in a sun-drenched living room, you might find Movie mode a bit dim. In this specific scenario, using the Bright TV Brightness setting alongside the standard preset can help. However, for those seeking the best Roku picture settings for movies in dark rooms, Movie mode remains the undisputed champion because it preserves the director's intent by not over-brightening black levels.
In 2024, Roku introduced AI-driven Smart Picture modes. While these are convenient for casual viewing as they attempt to identify the content type—sports vs. news—they often make aggressive adjustments that can feel inconsistent. When comparing Roku TV smart picture mode vs manual settings, the manual approach always wins for enthusiasts. Manual selection allows you to lock in specific parameters for SDR, HDR10, and Dolby Vision content, ensuring that the TV doesn't suddenly change its Contrast Ratio or Color Saturation in the middle of a pivotal movie scene.
| Feature | Vivid Mode | Movie Mode | Smart Picture (AI) |
|---|---|---|---|
| Color Temperature | Cool (Bluish) | Warm (Reddish/Natural) | Variable |
| Brightness | Maxed | Balanced | Auto-adjusting |
| Ideal Environment | Showroom/Very Bright | Dark Home Theater | Mixed Lighting |
| Accuracy | Low | High | Medium |
Level 2: Manual Tweaks to Fix Washed Out Colors and Blur
Once you have selected a base mode, it is time to dig into the manual sliders. One of the most common complaints I hear from readers is about how to fix washed out colors on Roku TV. This usually happens because users confuse TV Brightness with Picture Brightness. On a Roku, TV Brightness actually controls the backlight intensity. If this is too high, it floods the panel with light, killing the Contrast Ratio. Picture Brightness, on the other hand, adjusts the black levels of the actual image data.
To get the most out of your 4K panel, start with these baseline manual adjustments:
- Contrast: Set this to 100 to maximize the dynamic range between the darkest and lightest parts of the image.
- Brightness: Keep this near 50. Going higher will result in "milky" blacks that look grey.
- Sharpness: Lower this to 20 or below. High sharpness creates artificial halos around objects, which actually masks real 4K detail.
- Color: 45 to 55 is the sweet spot. Anything higher leads to oversaturation where faces look like they have a sunburn.
You also need a Kill List of features to disable. Manufacturers love to include "enhancement" features that actually degrade 4K integrity. You should immediately disable Noise Reduction and Dynamic Contrast. Noise Reduction smudges fine textures like skin pores or fabric weaves to hide digital artifacts, which is counterproductive when watching high-bitrate 4K content. Dynamic Contrast constantly shifts the light levels based on what is on screen, which can lead to distracting "pumping" effects in dark scenes.

When considering how to adjust backlight on Roku TV for bright rooms, always favor the TV Brightness setting in the Options menu rather than increasing the Picture Brightness slider. This allows the LEDs to punch through the Ambient Light without clipping the shadows in the video signal itself. Furthermore, if your specific Roku model supports Local Dimming, set it to High. This feature allows the TV to turn off specific zones of the backlight behind dark areas of the image, significantly improving the depth of blacks and reducing "blooming" around white subtitles.

Level 3: Deep Dive into Roku TV Expert Settings
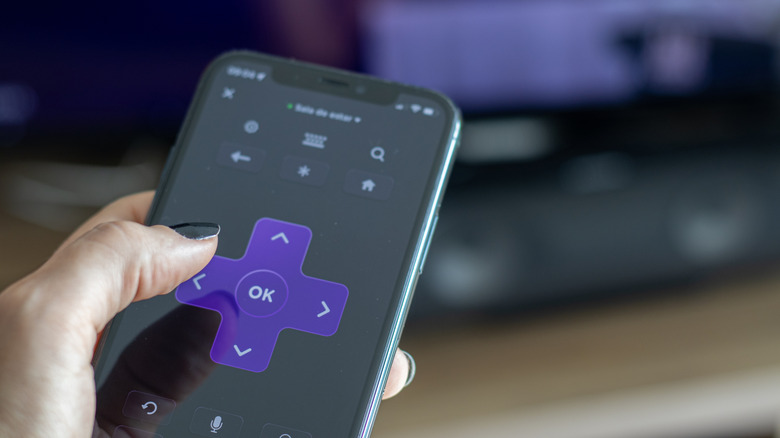
For those who want to push their hardware to its absolute limit, you need to access the Roku TV expert settings. Traditionally, these were only available through the Roku mobile app, but with Roku OS 12.5, many of these controls have migrated to the on-screen menu for supported models. This is where we move beyond simple sliders into professional-grade calibration.
The most critical adjustment here is Gamma Correction. For most home environments, a Gamma of 2.2 is ideal. It provides a smooth transition from black to white that feels natural to the human eye. If you find your room is exceptionally dark and you want a more "inky" look, you can experiment with 2.4, but 2.2 is the industry standard for a reason. You should also check the Color Temperature; ensure it is set to Warm. While Warm might look "yellow" for the first five minutes, it is the only setting that accurately reproduces the D65 white point used by Hollywood colorists.
If you are using the Roku mobile app for these adjustments, be aware that you might encounter a Signal Required message. This simply means you need to have active content playing on the HDMI port or app you are trying to calibrate. Roku settings are input-dependent, so you cannot calibrate the Global settings without a signal being present. The app also allows for 11-point White Balance adjustments. Unless you have a colorimeter and calibration software, I recommend leaving these values at default, as eyeballing white balance usually results in a skewed color cast that is hard to fix later.
Optimized Settings for Gaming and Sports
Gaming on a Roku TV, particularly with a PS5 or Xbox Series X, requires a completely different philosophy. Clarity is still important, but responsiveness is king. The most vital step is enabling Game Mode. This bypasses much of the TV's internal processing to significantly reduce Input Lag. Without Game Mode, there is a noticeable delay between your button press and the action on screen, which can be the difference between winning and losing in a fast-paced shooter.
For the best Roku TV Game Mode settings for PS5 and Xbox, you should also ensure your HDMI mode is set to Standard or HDMI 2.1 (if available) rather than Auto. This ensures the TV negotiates the full bandwidth required for HDR10 and high Refresh Rate gaming. Many modern Roku TVs also support Auto Low Latency Mode (ALLM) and Variable Refresh Rate (VRR). These should be toggled on within your console settings; the Roku TV will automatically detect the signal and lock into its high-performance state.
When it comes to the best Roku TV settings for sports clarity, the challenge is handling fast motion without the dreaded soap opera effect. While I generally recommend disabling motion smoothing on Roku TV for realistic motion in movies, sports can benefit from a very low setting of "Reduce Blur" if your TV provides separate sliders for blur and judder. This helps keep the football or hockey puck sharp as it zips across the screen. However, avoid "Reduce Judder" settings, as these create the artificial, overly smooth look that makes live broadcasts feel like cheap camcorder footage.

FAQ
How do I access picture settings on a Roku TV?
You can access the basic picture settings by pressing the Asterisk (*) button on your Roku remote while content is playing. This will open a side menu where you can find Options and Picture Settings. For more advanced controls, you can use the Roku mobile app on your smartphone, navigating to the Settings tab and selecting Expert Picture Settings.
What are the best Roku picture settings for high quality?
For the highest quality, start by selecting the Movie or Movie Dark picture mode. Set your Color Temperature to Warm, turn off all smoothing and noise reduction features (Action Smoothing, Action Clarity), and ensure your TV Brightness is set to a level that suits your room lighting without washing out the blacks.
How can I make my Roku TV screen brighter?
To increase brightness without ruining the image quality, adjust the TV Brightness setting (which controls the backlight) rather than the Picture Brightness slider. Setting TV Brightness to Brighter or Brightest will help the screen compete with sunlight in a well-lit room while maintaining the correct black levels for the content.
How do I turn off motion smoothing on a Roku?
Navigate to the Picture Settings menu by pressing the Asterisk button during a movie. Look for a sub-menu labeled Advanced Picture Settings. Within this menu, find Action Smoothing or Action Clarity and set it to Off. This removes the artificial frames the TV inserts, eliminating the soap opera effect.
What does Game Mode do on a Roku TV?
Game Mode reduces Input Lag by turning off unnecessary picture processing. This creates a more responsive connection between your controller and the screen, which is essential for gaming on consoles like the PS5 or Xbox. While it might slightly reduce some visual processing flourishes, the performance gain is vital for interactive media.
Can I change picture settings for each HDMI input on Roku?
Yes, Roku TVs feature per-input memory. This means you can have a highly calibrated Movie mode for your Blu-ray player on HDMI 1 and a high-performance Game Mode for your console on HDMI 2. When you switch inputs, the TV will automatically recall the specific settings you saved for that port.
Taking the time to move past the factory defaults is the only way to truly see what your 4K hardware is capable of. By utilizing Roku OS 12.5 features and the Expert Picture Settings available through the mobile app, you transform a standard display into a calibrated window into your favorite worlds. Whether you are aiming for a cinematic experience or a competitive gaming edge, these tweaks ensure that every one of those 100 million households gets the clarity they paid for.