Quick Facts
- Average Cost: $10 - $40 (compared to $200+ for commercial units)
- Top Camera Choices: Wyze Cam, Blink Outdoor, Ring Stick Up Cam
- Connection Standard: 2.4-GHz Wi-Fi for optimal outdoor range
- Optimal Height: 5 to 10 feet above ground level
- Key Accessory: Wasserstein Bird Feeder Case or acrylic window feeder
- Installation Time: 15 - 30 minutes
To create a DIY bird feeder camera, place a transparent acrylic feeder on a window using suction cups. Position your security camera inside the window facing out or use a weatherproof housing like the Wasserstein Bird Feeder Case for outdoor mounting. Adjust the camera's focus for close-range viewing and enable motion detection alerts in the companion app to record bird visits in real-time.
The Benefits of E-Waste Upcycling
We all have that junk drawer filled with yesterday's technology. Old smartphones, tangled cables, and those first-generation smart cameras we replaced during last year's Prime Day. Instead of letting those devices contribute to the growing problem of electronic waste, we can give them a second life in our backyards. Transforming an old security camera into a homemade smart bird feeder is one of the most rewarding weekend projects for any smart home enthusiast. It combines sustainability with a deep dive into nature, allowing us to practice e-waste upcycling while enhancing our backyard habitat.
The popularity of this hobby is backed by significant data. According to the U.S. Fish and Wildlife Service, 96.3 million people in the United States, or approximately 37% of the population aged 16 and over, participated in observing, feeding, or photographing birds in 2022. This massive interest has fueled a booming tech niche. The global smart bird feeder market was valued at approximately $325 million in 2024 and is projected to grow to $1.1 billion by 2033. However, you don't need to spend hundreds of dollars to join the movement. While birding enthusiasts in the United States spent over $24 billion on specialized equipment in 2022, a DIY bird feeder camera offers a budget-friendly alternative that performs nearly as well as high-end commercial models.

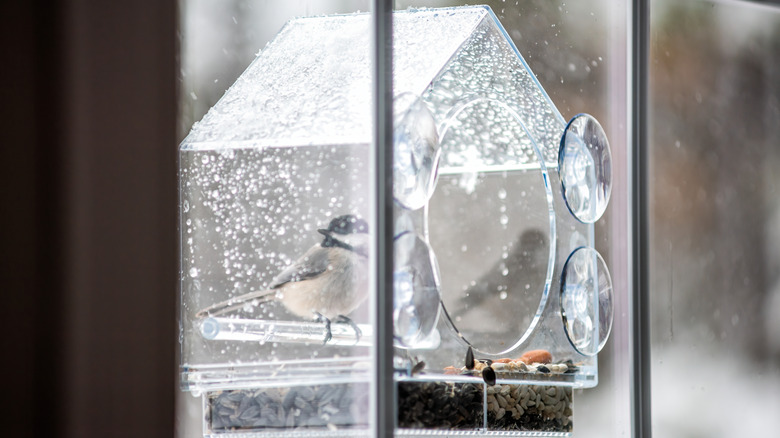
Method 1: The Window Bird Feeder Camera Setup
The easiest way to start is the window bird feeder camera setup. This method is perfect if you are looking for the cheapest way to build a smart bird feeder with solar power or if you have an older, non-weatherproof camera like an original Wyze Cam or a Nest Cam Indoor. By keeping the electronics inside, you bypass the need for expensive weatherproofing while still getting a front-row seat to avian behavior.
To begin, you will need a transparent acrylic feeder. Brands like Nature Anywhere make excellent models that attach directly to the glass with a high-strength suction cup mount. Once the feeder is filled with seed and secured, your task is to position the camera on the interior windowsill. The trick to successful through-glass filming is minimizing the distance between the lens and the glass. If there is even a small gap, the camera’s infrared night vision will reflect off the window, creating a white glare that renders your footage useless.
We recommend disabling the status lights and the infrared night vision in your camera settings for this specific setup. Because birds are active during the day, you won't need the IR sensors anyway. If the image appears soft, you might encounter focus issues. Most security cameras are designed to focus on objects ten feet away, not three inches. You can often how to fix focus issues for bird camera through window glass by adding a small macro lens attachment—the kind designed for smartphones—over your security camera lens using a piece of clear tape. This allows for a much sharper view of the feeding tray.
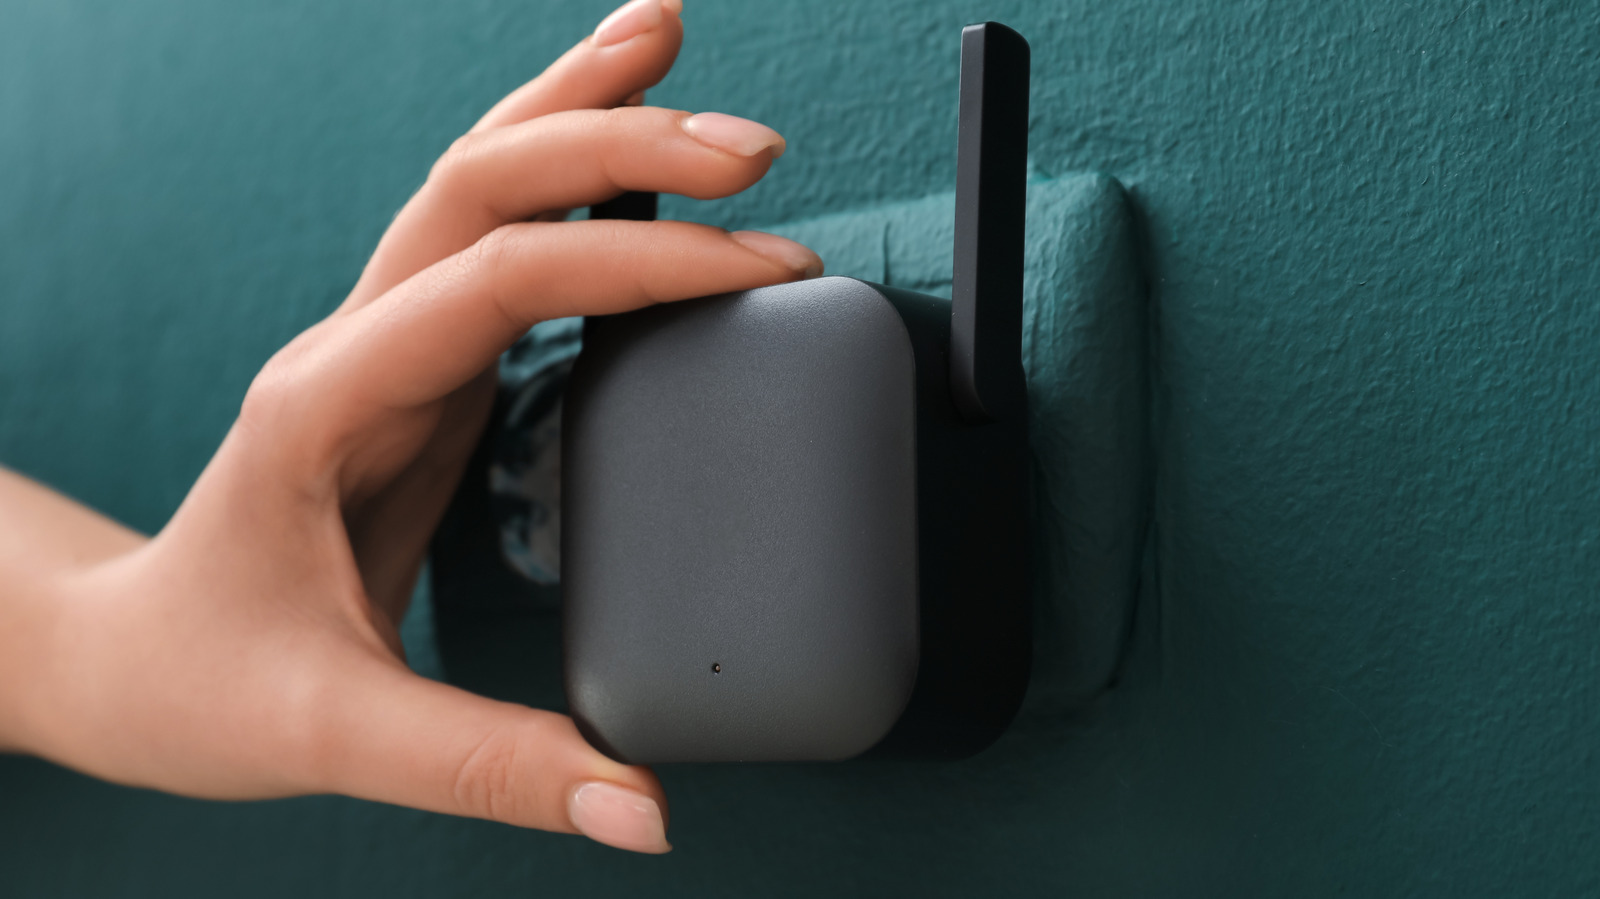
Method 2: Custom Outdoor Build with Weatherproof Housing
If you want more freedom in placement, such as mounting your DIY bird feeder camera on a fence post or a tree, you will need to move the hardware outside. This requires a dedicated DIY bird feeder camera housing for blink outdoor or similar models. Popular choices for repurposing include the Wyze Cam Outdoor, Blink Outdoor, and Ring Stick Up Cam due to their compact size and motion detection features. These cameras offer HD resolution and battery-powered options that simplify placement without needing to run long power cables across your lawn.
The gold standard for this approach is using the Wasserstein Bird Feeder Case. This accessory is essentially a bird feeder with a built-in slot specifically designed to hold popular smart cameras. It provides a weatherproof housing that protects your tech from rain and snow while providing a natural-looking perch for the birds. When compared to specialized brands like Bird Buddy, this setup offers similar functionality—motion-activated recording and remote viewing—at a fraction of the cost.
For a truly maintenance-free experience, consider solar power integration. Most outdoor cameras from Ring or Blink have compatible solar panels. By mounting a small panel nearby, you can keep the camera topped off indefinitely, ensuring you never miss a rare visitor because the battery died. This setup effectively creates a professional-grade homemade smart bird feeder that can withstand the elements year-round.
| Feature | Window Setup (Indoor) | Outdoor Housing (Post/Tree) |
|---|---|---|
| Best Camera Type | Indoor Wyze, Nest, or Kasa | Blink Outdoor, Ring Stick Up, Wyze Outdoor |
| Weatherproofing | Not required (stays inside) | Essential (Wasserstein or similar) |
| Power Source | Standard wall outlet | Battery or Solar Power |
| Connectivity | Excellent (near router) | Variable (2.4-GHz Wi-Fi dependent) |
| Complexity | Very Low | Moderate |
Optimizing Your DIY Bird Feeder App Settings
Once your hardware is in place, the magic happens in the software configuration. Security cameras are designed to alert you to intruders, not blue jays. To avoid getting hundreds of notifications every time the wind blows a nearby branch, you need to refine your motion detection alerts.
Start by setting up motion alerts for diy bird feeder camera app by creating a specific Detection Zone. In the app, draw a box that covers only the feeding tray and the immediate area where birds land. This ignores background movement like swaying trees or passing cars. Most modern apps also allow you to adjust sensitivity; we suggest starting at a medium-high level so even smaller birds trigger the recording.
Another critical factor is your storage method. You have two main choices: cloud storage or local SD card recording. Cloud storage is convenient for remote viewing and sharing clips on social media, but it often requires a monthly subscription. If you want to keep costs down, choose a camera with a microSD slot. This allows you to store hours of avian behavior footage locally. Finally, remember that your backyard's distance from your router can impact the stream quality. Ensure your camera is connected to a stable 2.4-GHz Wi-Fi signal, as this frequency penetrates exterior walls much better than 5-GHz signals.
Dealing with Squirrels and Pest Management
A successful DIY bird feeder camera will eventually attract uninvited guests. Squirrels and raccoons are notorious for raiding feeders and, more importantly, chewing on cables. If you are using a powered camera, we highly recommend shielding any exposed wires with split-loom tubing or metal conduits.
To protect the integrity of your homemade smart bird feeder, placement is key. Aim for an optimal mounting height of 5 to 10 feet. This is high enough to discourage ground predators but low enough for easy seed refills. If you are mounting on a pole, installing a baffle—a wide, downward-facing cone—below the feeder is the most effective way to stop squirrels from climbing up.
Furthermore, keep the area clean. Dropped seeds can attract rodents, which might eventually find their way to your home's foundation. Regularly cleaning the feeding tray not only helps with pest management but also prevents the spread of avian diseases, ensuring your backyard remains a healthy sanctuary for the birds you love to watch.
FAQ
How do you make a DIY bird feeder camera?
To build a DIY bird feeder camera, you need a repurposed security camera and a bird feeder. You can either mount a transparent acrylic feeder to a window and place the camera inside looking out, or purchase a weatherproof housing like the Wasserstein case to mount an outdoor camera directly onto a tree or post. Connect the camera to your Wi-Fi and use the app to monitor visits.
What is the best camera for a homemade bird feeder?
The best choices for a DIY bird feeder camera are the Wyze Cam v3, Blink Outdoor, and Ring Stick Up Cam. These models are selected for their compact size, reliable motion-activated recording, and excellent app support. The Wyze Cam v3 is particularly popular for window setups due to its high-quality sensor and affordable price point.
Can I use an old smartphone as a bird feeder camera?
Yes, you can repurpose an old smartphone using apps like AlfredVideo or Manything. These apps turn your phone into a motion-sensing security camera. However, smartphones are not weatherproof and have poor battery life compared to dedicated cameras, so they are best suited for short-term window-mounted setups where they can remain plugged into power.
How do I protect my DIY bird feeder camera from rain?
For outdoor setups, use a dedicated weatherproof housing designed for your specific camera model. If you are building a custom wooden feeder, ensure the camera is recessed deep within a "roofed" section to keep the lens dry. For added protection, apply a silicone skin to the camera body to prevent moisture ingress.
Do bird feeder cameras need Wi-Fi?
Most smart bird feeders require a 2.4-GHz Wi-Fi connection to send alerts and stream live video to your phone. If your Wi-Fi signal doesn't reach your backyard, you might consider using trail cameras for backyard bird feeder photography, as these record to an internal SD card and do not require a constant internet connection.
Conclusion
Building a DIY bird feeder camera is the perfect marriage of technology and nature. By learning how to repurpose old wyze cam for bird feeder use, you save money, reduce electronic waste, and gain a unique window into the natural world. Whether you choose a simple window mount or a rugged outdoor setup with solar power, the result is the same: a front-row seat to the fascinating lives of your local birds.
This project proves that you don't need the most expensive gadgets on the market to create a truly smart home. With a little creativity, a few suction cups, and some e-waste upcycling, you can transform a dusty old security camera into a source of daily joy and education for the whole family. So, grab that old camera out of the drawer and start building your own backyard broadcast station today.